6 Steps to Install and Configure OCI CLI
You created yourself an OCI account, a tenancy, a few compute instances and possibly a database as well. You got around the console pretty fast, however you want more: more control.
That is where the CLI comes into place. The OCI CLI is a command line interface for the Oracle Cloud Infrastructure (OCI). You can use the tool to administer all aspects of the cloud environment, instead of using the console, the GUI, you can use the CLI.
Why would you want to use a command line tool when you do have a console?
This is a great question! Many DBAs prefer to automate things through scripts, such as shutting down and starting up instances that are not needed to run overnight, list certain things for reporting, schedule scripts in a cronjob, or just out of habit prefer the command line and scripts for more control. For things to be scripted, you must have the CLI installed on a VM, which could be a Linux, Mac OS or Windows server. If you administer things in the cloud, it is recommended you become familiar with the CLI, which is very well documented by Oracle.
For demonstration purposes, we will go through 6 steps to install and setup the CLI on a Linux VM. The OCI CLI is not included with the standard OL8 image, and needs to be installed with the dnf command. The installation is pretty straight forward, but some configuration afterwards is required for tenancy, user id and SSH private key fingerprint for authentication.
Installation:
The installation needs to run as root and takes very little time:
dnf -y install python36-oci-cli
Configuration:
Once the installation is successful, you need to configure the tool with the following steps:
1) create the default directory location for the config file and lock it down
2) create an ssh key pair for connection
3) setup the API Key on OCI to tell the OCI who you are
4) setup the configuration file in the default directory
5) test the oci cli commands
1) Let’s setup the directory .oci! In the root user’s home directory, on the VM where you want to set up the cli, create the default directory location and tighten the permissions for it. If the permissions are wide open on this directory, the tool itself will not like it.
mkdir /root/.oci
chmod 700 /root/.oci
2) Create an ssh key, inside the .oci directory. This key can be placed anywhere on the VM, but for consistency purposes, we will create it in the .oci directory. The key will be used for connection of the cli, to your tenancy. You can use ssh-keygen command to generate the public key/private key pair. With the command below, you will generate a pair: privkey.pem and privkey.pem.pub
ssh-keygen -t rsa -b 4096 -m pem -f privkey.pem
Next, you need to extract the public key, to use in in the OCI console, the OCI needs to know who you are when you try to connect with the tool. The output of the rsa command below looks pretty cryptic, and so it should.
openssl rsa -in privkey.pem -pubout
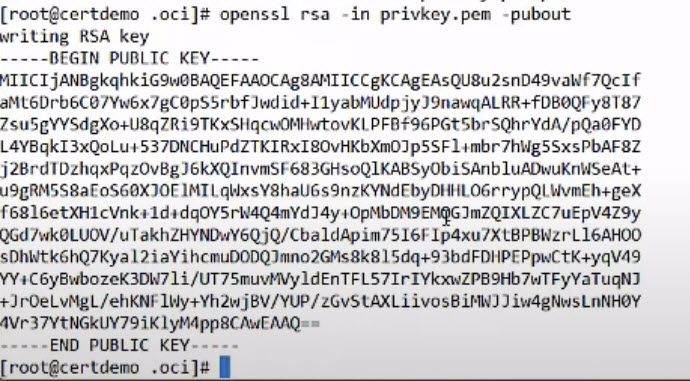
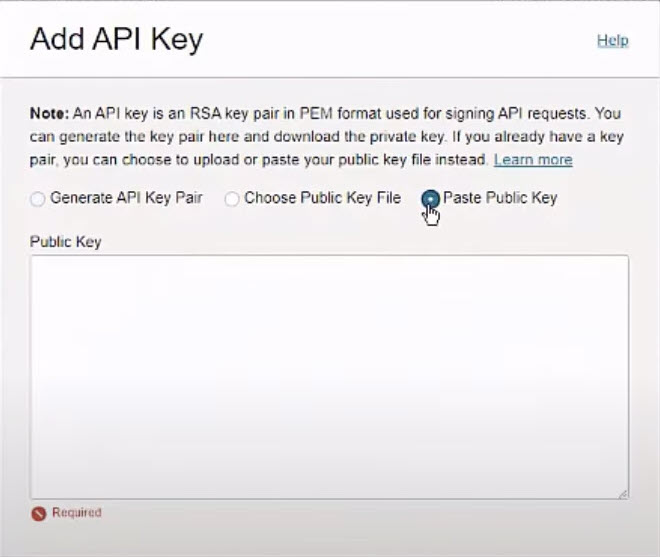
3) When you run the CLI from a VM, the tool needs to connect to the OCI, to be able to run the commands you want. The OCI must be able somehow to authenticate you. For this authentication to take place, you need to create the API Key, with the option of using the public key that you just extracted in step 2. In the OCI console, under My Profile navigate to API Keys, and click on Add API Key, by selecting Paste Public Key option, and paste the public key extracted above. Click Add.
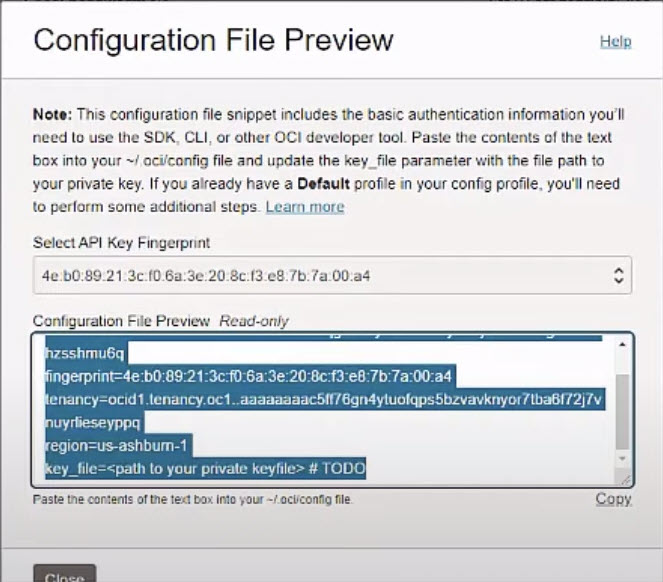
4) The Configuration File Preview screen shows up. You will see the API Key Fingerprint and a Configuration File Preview. The content of the preview will be the content of the configuration file on your VM. Copy and paste the text into the configuration file on your VM, which will be located in the .oci folder. The name of the file is config.
vi config
The file contains the user information, the fingerprint, the tenancy. The only thing you need to specify is the location of the private key file in the key_file parameter.

Save the file and tighten the permissions on it: chmod 600 config
5) After the installation and configuration is complete, test the oci cli to confirm you can connect and run commands. You can also verify the output with the output of the console. As an observation, the output you get from any of these commands, are JSON document type, which you can change to table output, by using the “–output table” option. Let’s look at a few commands you can run:
List all the compartments you have access to in your tenancy:
oci iam compartment list
Update a compartment description:
oci iam compartment update --description OCIworkshop --compartment-id <your-compartment-id-comes-here>
List the content of a specific bucket in the object store:
oci os object list -bn public-bucket
Upload a files into a specific bucket in the object store:
oci os object put --namespace <your-namespace-comes-here> --bucket-name public-bucket --file /root/index.html
Now it’s your turn to setup the oci cli! See more details below!
Free Video Tutorial
Training with Oracle Certified Master DBA John Watson
Ready to immerse yourself and learn more about the OCI, we have a great class recommendation for you: Oracle Cloud Infrastructure (OCI) Foundations: Getting StartedTag:DBA, OCI, OCI CLI, Oracle, Oracle Cloud, oracle database, SQL


